Marking the Waterline
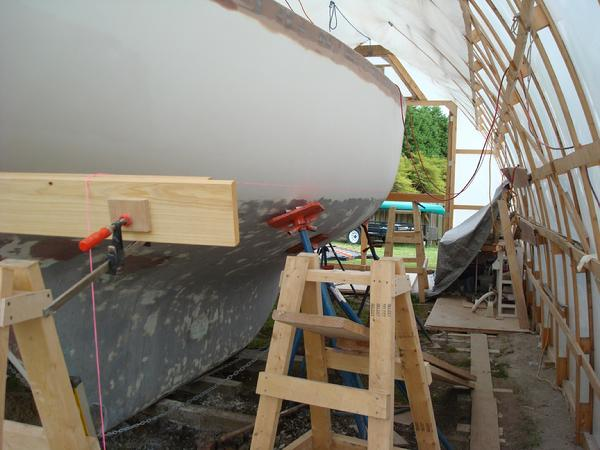
Updated 18 May 11: I retaped the waterline in preparation for applying the fishing coats of Interlux Perfection on the topsides. As mentioned in the previous post on marking the waterline this time we raised the edge 1/4." We produced a much sharper and straighter line this time. We used the same system with straight edge boards rigged across the scaffolding supports and strings. But this time I stood back and sighted over the straight edge lining it up with the string. Gayle then placed the pointy end of a pencil on the line and I instructed her "up" or "down" as the situation required until all three were lined up. She made a series of marks this way all the way down the waterline. It sounds tedious, and it was, but it only took about 30 minutes per side. Then we connected all the dots with a three foot long flexible metal straight-edge. It produced a much more accurate line.
This technique is used by Tim Lackey and also featured in the May/June 2010 Wooden Boat magazine.
I found the scribed waterline last week when I stripped the bottom paint from the boat. I don't know how accurate it is so I am taking a big leap of faith here. The boat is level fore and aft and side-to-side but this technique only requires it be level side-to-side. I made a pencil mark 4 1/4" above the scribed line at the bow, stern, and max beam on both sides. I used a level and a carpenters ruler to make sure the mark was accurate due to the hull flaring out from the scribed line. Tim has some good pictures of how to do this. Click here to see his technique for striking the waterline.
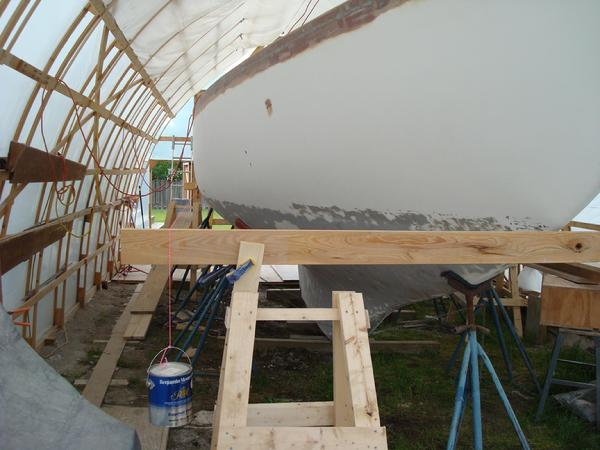
Once I had the marks in place I added some risers to the outside edges of the four scaffolding supports I would be using so they would be tall enough to reach above the scribed waterline. Then I scarffed together a couple of pieces of bald cypress I had from when I built our deck a few years ago. I made them 12 feet long since they have to be wider than the max beam of the boat which is 10'8". I didn't want to drill holes in the wood so I clamped them together. Then I clamped the boards to the scaffolding so they were parallel to the ground and I checked them with a bubble level.
Now read carefully--I wanted to raise the waterline 4 1/2" above the scribed line. So, I raised the boards till they were 4 1/4" above the scribed waterline which would allow me to bring the primer down 1/4" below where I want the final top edge of the bottom paint to be. Got that? Good, because it took me several weeks of thinking this whole thing through to figure out what would go on top of what. After the primer is on I'll take the barrier coat and bottom paint to that same line, retaping of course because I'll be painting from the top to the bottom for the primer and from the bottom to the top for the barrier coat and bottom paint. Then I'll retape it for the topside final paint next spring and then raising the waterline another 1/4" for the bottom paint to cover the very bottom edge of the topside paint. If you are confused then you are in good company. I am sure I could make it harder but I haven't figured out how yet. But, I digress . . . .
After the leveling boards were in the right place and checked for accuracy with the bubble level, I ran construction string from one end to the other and hung paint cans from the strings to keep them tight. I brought them right up to the maximum beam of the boat. Here is what stumped me and took the wind out of my sails, so to speak, for the rest of the day. The fore and aft board are 4 1/4" above the scribed waterline. But the line on both sides of the max beam is only 3 1/4" above the scribed line. How is that you ask? I don't know. If the scribed line were actually the line for the boot top maybe that would make sense but it is the waterline mark. Doesn't matter though. I know the bow and stern are straight and true. I'll prime as marked and perhaps raise it another 1/2" for the barrier coat and bottom paint. There is always going to be something that makes you scratch your head--it is a boat after all.
Tomorrow I'll tape the waterline, stage all the paint and rollers and other items I'll need. I'll wipe the boat down tomorrow afternoon and unless the weather goes to hell I'll prime on Wednesday.
I found the scribed waterline last week when I stripped the bottom paint from the boat. I don't know how accurate it is so I am taking a big leap of faith here. The boat is level fore and aft and side-to-side but this technique only requires it be level side-to-side. I made a pencil mark 4 1/4" above the scribed line at the bow, stern, and max beam on both sides. I used a level and a carpenters ruler to make sure the mark was accurate due to the hull flaring out from the scribed line. Tim has some good pictures of how to do this. Click here to see his technique for striking the waterline.
Once I had the marks in place I added some risers to the outside edges of the four scaffolding supports I would be using so they would be tall enough to reach above the scribed waterline. Then I scarffed together a couple of pieces of bald cypress I had from when I built our deck a few years ago. I made them 12 feet long since they have to be wider than the max beam of the boat which is 10'8". I didn't want to drill holes in the wood so I clamped them together. Then I clamped the boards to the scaffolding so they were parallel to the ground and I checked them with a bubble level.
Now read carefully--I wanted to raise the waterline 4 1/2" above the scribed line. So, I raised the boards till they were 4 1/4" above the scribed waterline which would allow me to bring the primer down 1/4" below where I want the final top edge of the bottom paint to be. Got that? Good, because it took me several weeks of thinking this whole thing through to figure out what would go on top of what. After the primer is on I'll take the barrier coat and bottom paint to that same line, retaping of course because I'll be painting from the top to the bottom for the primer and from the bottom to the top for the barrier coat and bottom paint. Then I'll retape it for the topside final paint next spring and then raising the waterline another 1/4" for the bottom paint to cover the very bottom edge of the topside paint. If you are confused then you are in good company. I am sure I could make it harder but I haven't figured out how yet. But, I digress . . . .
After the leveling boards were in the right place and checked for accuracy with the bubble level, I ran construction string from one end to the other and hung paint cans from the strings to keep them tight. I brought them right up to the maximum beam of the boat. Here is what stumped me and took the wind out of my sails, so to speak, for the rest of the day. The fore and aft board are 4 1/4" above the scribed waterline. But the line on both sides of the max beam is only 3 1/4" above the scribed line. How is that you ask? I don't know. If the scribed line were actually the line for the boot top maybe that would make sense but it is the waterline mark. Doesn't matter though. I know the bow and stern are straight and true. I'll prime as marked and perhaps raise it another 1/2" for the barrier coat and bottom paint. There is always going to be something that makes you scratch your head--it is a boat after all.
Tomorrow I'll tape the waterline, stage all the paint and rollers and other items I'll need. I'll wipe the boat down tomorrow afternoon and unless the weather goes to hell I'll prime on Wednesday.